Contact us directly to discuss your specific requirements, help you with purchasing, or with any other questions.
This "how-to-connect" documentation will explain the initial configuration of an example connection from Layer2 Cloud Connector synchronization history XML files to a SharePoint Online List in Office 365.
This guide presupposes that you have installed the Layer2 Cloud Connector and that you are familiar with its basic functionality. The Layer2 Cloud Connector User Documentation will provide you with all necessary information.
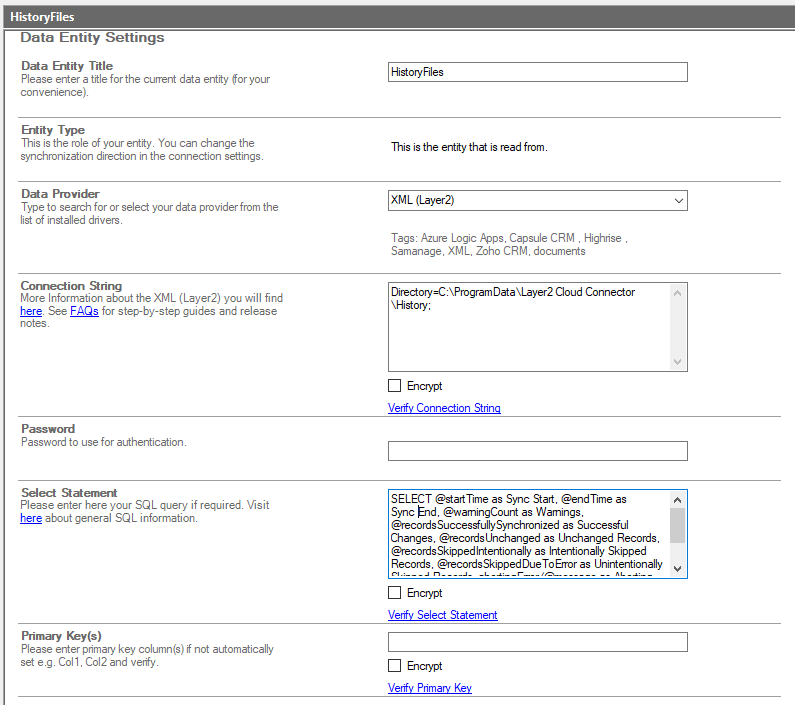
Set up "Data Entity 1" as the source entity, select our XML data provider and fill out the configuration settings.

Connection String:
Directory=C:\ProgramData\Layer2 Cloud Connector\History;
Select Statement:
SELECT @startTime as Sync Start, @endTime as Sync End, @warningCount as Warnings, @recordsSuccessfullySynchronized as Successful Changes, @recordsUnchanged as Unchanged Records, @recordsSkippedIntentionally as Intentionally Skipped Records, @recordsSkippedDueToError as Unintentionally Skipped Records, abortingError/@message as Aborting Error FROM /history/entries/entry[not(@endTime = '0001-01-01T00:00:00.0000000')]
The select statement utilizies aliasing to provide auto-mapping-compatible column names. You can adjust those names based on your own SharePoint list configuration.
We filter out any currently running synchronizations with the XPath condition near the end of the select statement because SharePoint cannot handle those temporary end time values.
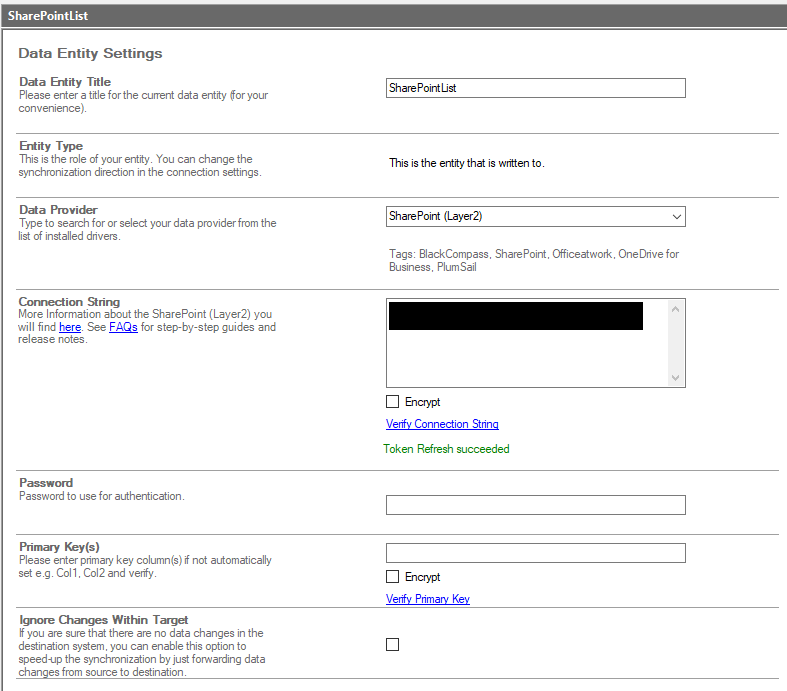
Set up "Data Entity 2" as the target entity, select our SharePoint provider, fill out the configuration settings and finally click on "Refresh Authentication Token" to log into your SharePoint.

Connection String:
Url=https://<MySharePointListUrl>/;Authentication=Microsoft_Modern;
Please note: This is a sample with placeholders to be replaced with your actual settings. Please refer to the product documentation for SharePoint provider setup, if this configuration does not work for you.
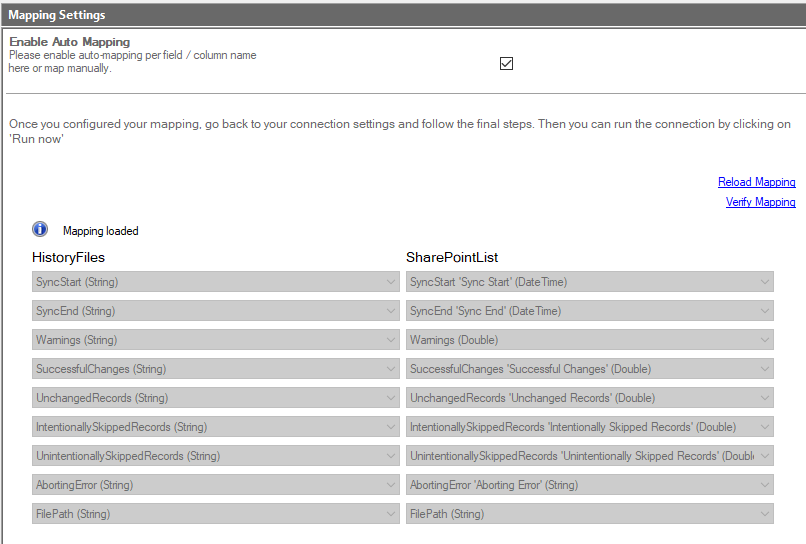
Navigate to the mapping configuration for this connection and wait for the auto-mapping to be calculated.

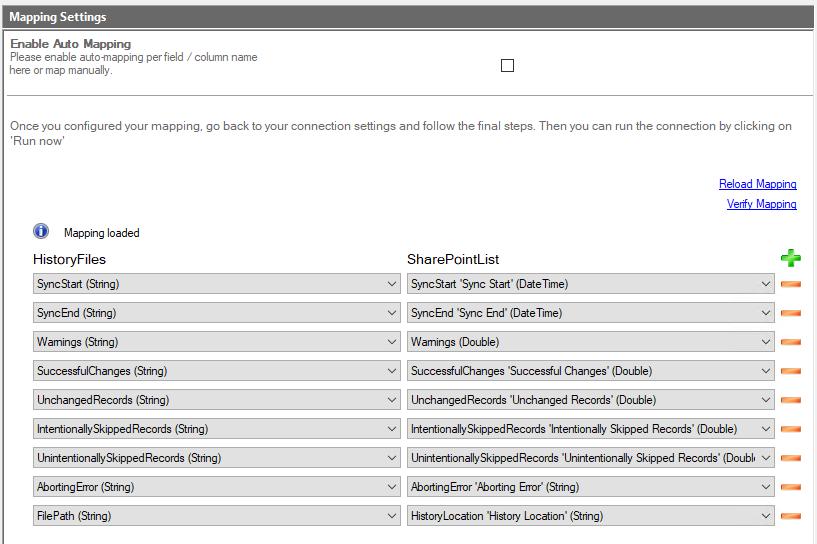
Our XML provider comes with a "FilePath" column that shows the location of scanned XML files. SharePoint lists have an internal column called "FilePath", so in this case, we have to manually adjust the mapping.
Disable auto-mapping and adjust the FilePath mapping entry to point to the SharePoint column that should contain the XML file path. Then verify the mapping to ensure it is configured correctly.
