HOW TO CONNECT NEXTCLOUD WITH SHAREPOINT
The "how-to-connect" documentation will explain the initial configuration of an example connection from Nextcloud to a SharePoint Online Library in Office 365. We will be synchronizing data stored in Nextcloud.
We will also explain why a Nextcloud SharePoint integration and synchronization is helpful and what advantages it offers.
You can learn more about Layer2 Cloud Connector and its basic functionality in our Layer2 Cloud Connector User Documentation. If you haven't start your free trial yet, you can download it now.
Connect Nextcloud with SharePoint step-by-step
Layer2 Cloud Connector works here as a layer between Nextcloud and your local computer. Go to https://nextcloud.com download and install the Windows Desktop client. In the installation process you can set the desired local folder from your computer for the synchronization.
Step 1 - configuring Nextcloud
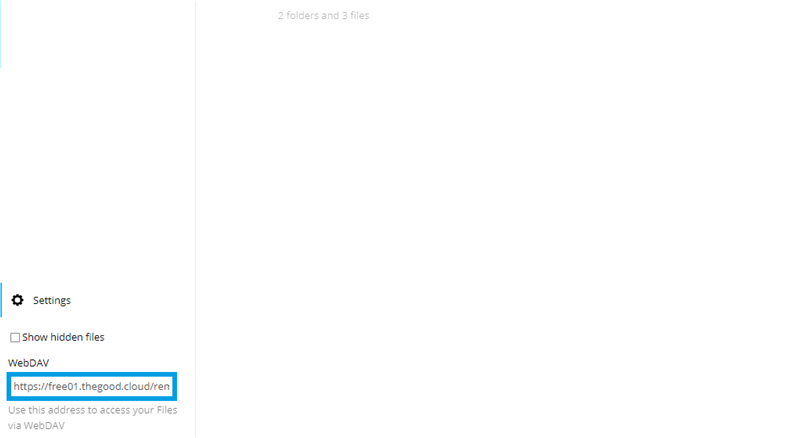
Go to your Nextcloud account and get the server address. You can read the server address from your URL or go to the left bottom side from your account and copy the WebDAV address.
Start the Nextcloud client and write the WebDAV address to connect to your cloud server.
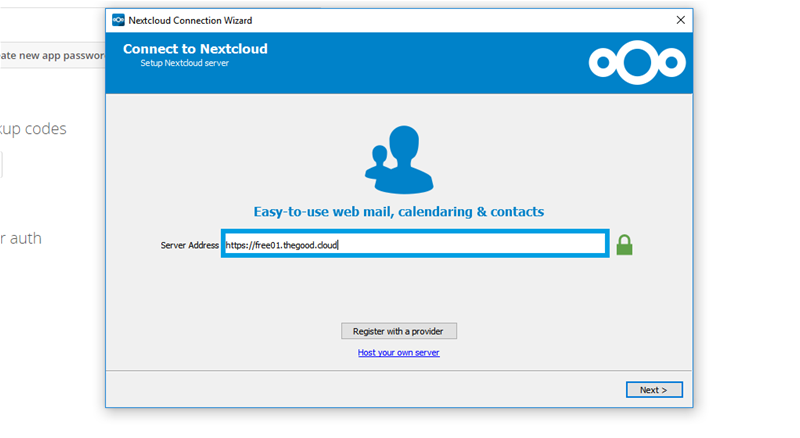
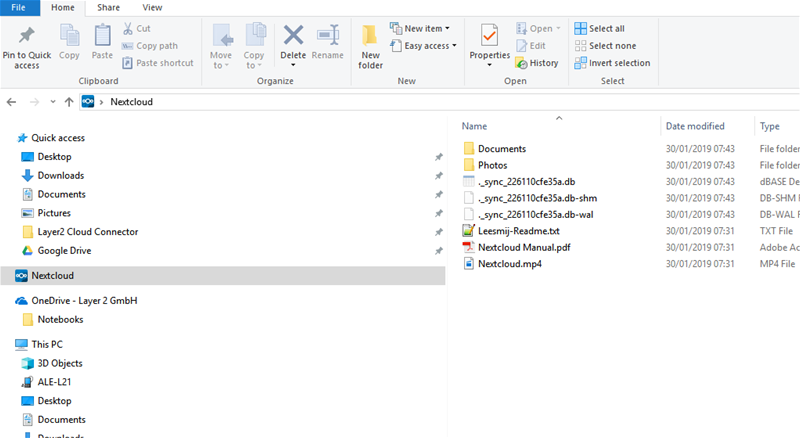
Log in into your account to grant access to the application. After that, you will get a mapped folder into your Windows Explorer with the data from your Nextcloud.
Step 2 - create a new connection
Create a new connection by using the Create New Connection option in the Actions pane (right-hand side). The new connection will appear at the bottom of the Connection Manager List (left-hand side). Click on your newly created connection to open the connection configuration settings.
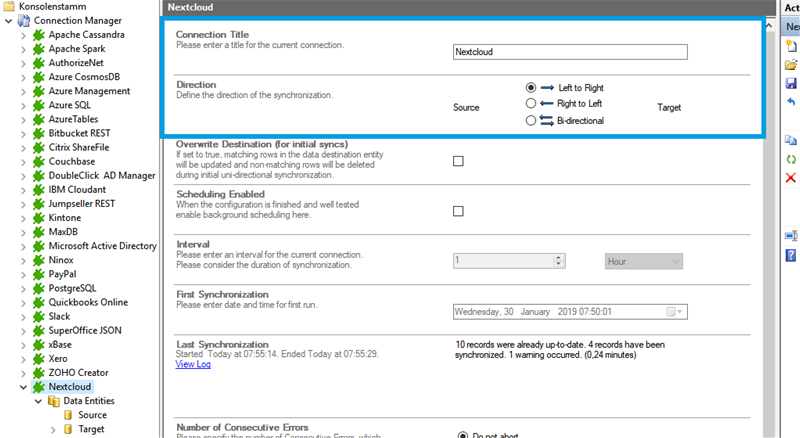
Choose a meaningful name for your connection and replace the current title "New Connection" with it. An initial connection should always be uni-directional to assure that both data entities are identical before switching to bi-directional. Therefore, choose Left to Right as Direction. You can change this setting after your initial synchronisation finished successfully.
Step 3 - configure Data Entity 1
We will now set up our Data Entities. Go to the data entity “Data Entity 1” to open the configuration settings.
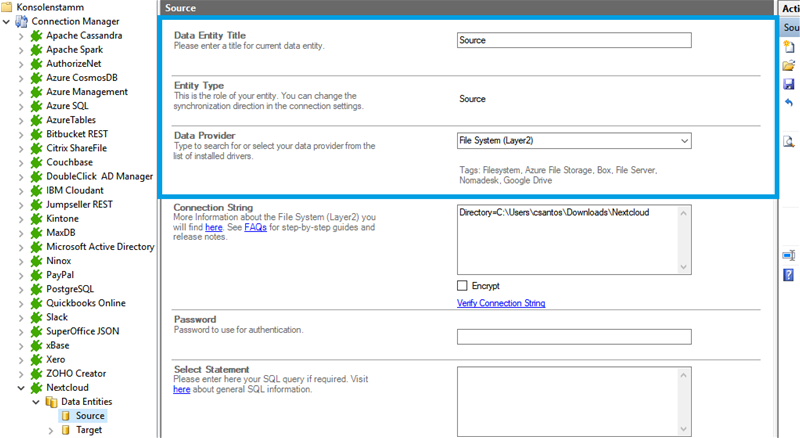
Choose a Data Entity Title. It is recommended to give your entities meaningful names to maintain an overview when you decide to set up multiple connections.
Select the Data Provider for File System from the data provider list. You can search for File System by typing into the selection box.
For the Connection String, we need the information mentioned in step1. You can copy the below connection string and adjust it to match your gathered information. Use the Verify Connection String option to evaluate if the provided connection string is valid.
Directory=C:\Pathtoyour\Nextcloud;
- "Directory=pathtoyourlocaldirectory;" this property defines which folder will be used for the synchronization.
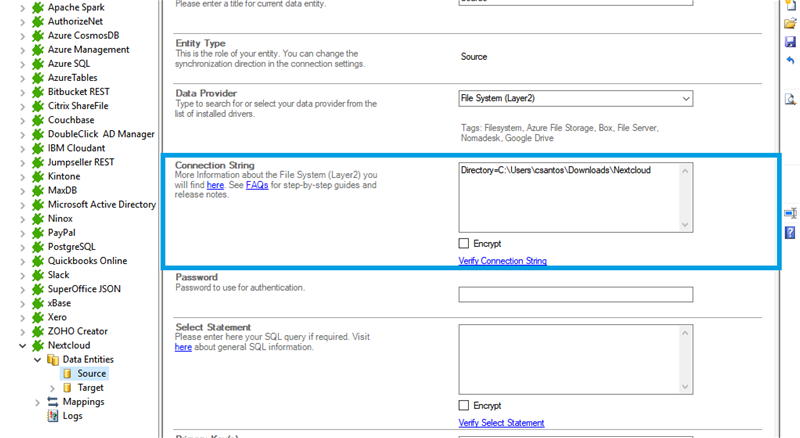
The Select Statement text box is used to define specific data queries. The select statement is not necessary in this case.
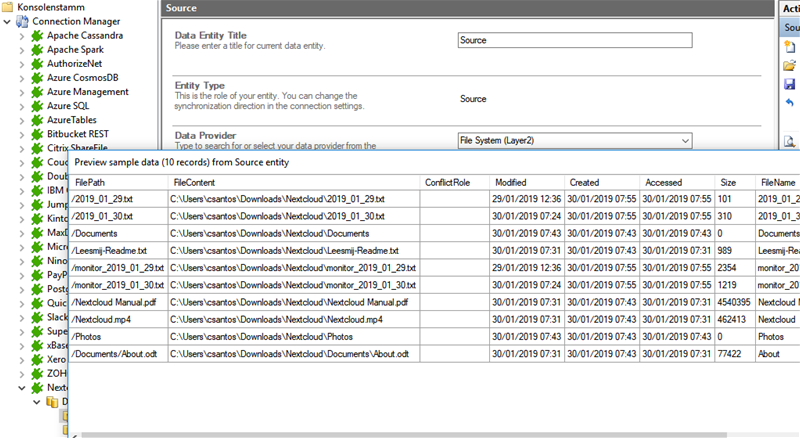
To check if all necessary columns are received, you can use the Preview Data option on the right-hand pane which will provide you with a pop-up window showing your sample data from your Nextcloud entity.
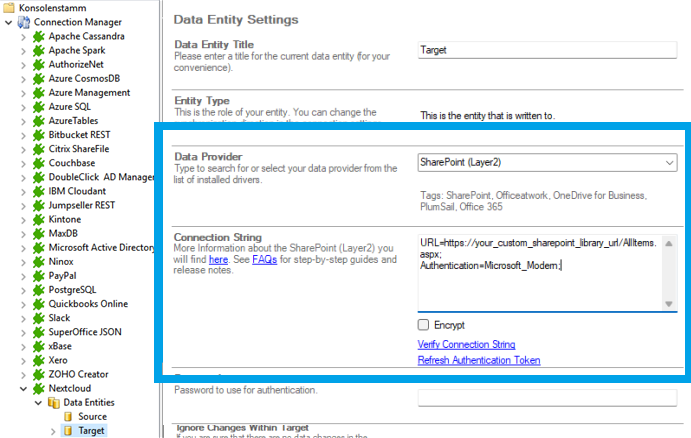
URL=https://your_custom_sharepoint_library_url/AllItems.aspx;Authentication=Microsoft_Modern;
- "URL=https://your_custom_sharepoint_url/AllItems.aspx;" this property defines the URL of your custom library that will be addressed.
- Authentication=Microsoft_Modern;" this property will determine the authentication method used. Microsoft_Modern is the default authentication method to access Microsoft Office 365 / SharePoint Online and should work in most cases, even if the SharePoint site is connected to an ADFS. This authentication does not need any further connection string settings, other than the URL of the connected system.
- Optional: Parameter "User" for information what account has been used for authentication.
Step 4 - configure Data Entity 2 to connect Nextcloud with SharePoint
We are going to send the data to a custom SharePoint Online library. It's required that you set up this library prior to the next steps. Your library should contain matching columns according to your source entity.
Use the left-hand pane to switch to the data entity "Data Entity 2". We will be using the Layer2 SharePoint Provider for this setup.
For more information about the SharePoint provider visit:
https://www.layer2solutions.com/support/cloud-connector-faqs/layer2-csom-sharepoint-ado-net-provider.
You can copy the Connection String which contains the minimum of required properties to connect to your custom SharePoint Online library.
Save your changes by using the right-hand pane option Save Changes.
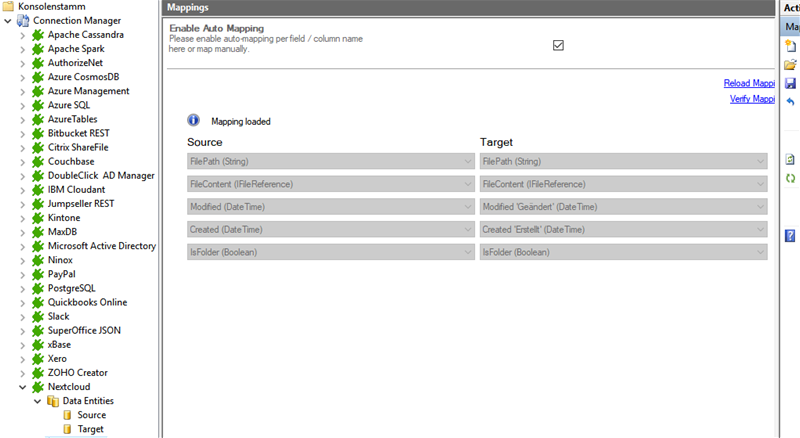
In the next step, we will configure our mapping settings. Click on the Mappings option on the left-hand pane. If your fields from SharePoint are named identical to the fields from your source system, the Enable Auto Mapping option will match those columns. Disabling this option allows you to match your columns as needed. We enabled auto-mapping in our setup. Save your changes by using the right-hand pane option Save Changes.
Step 5 - run your Nextcloud SharePoint connection
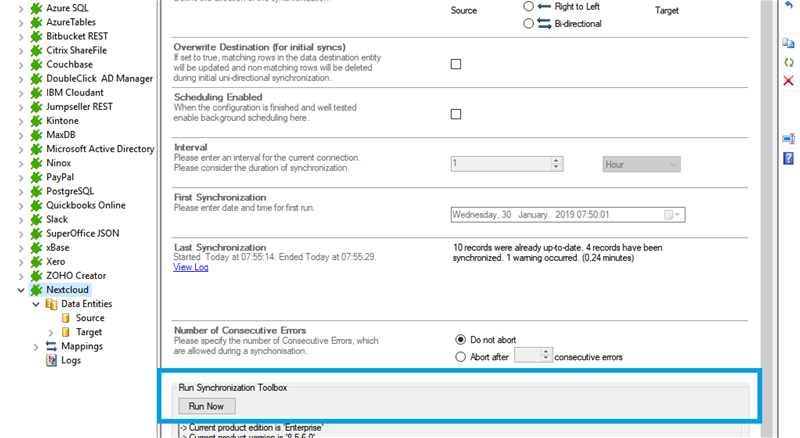
To run your connection switch back to the main connection configuration node and use the Run Now Button located on the bottom of the setup page. The Run Synchronization Toolbox will also display the synchronization process.
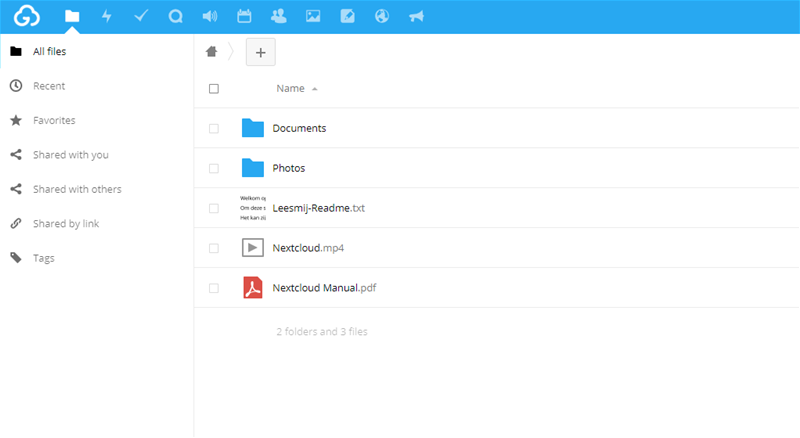
Here you can see a data preview of the information we have accessed in our source entity.
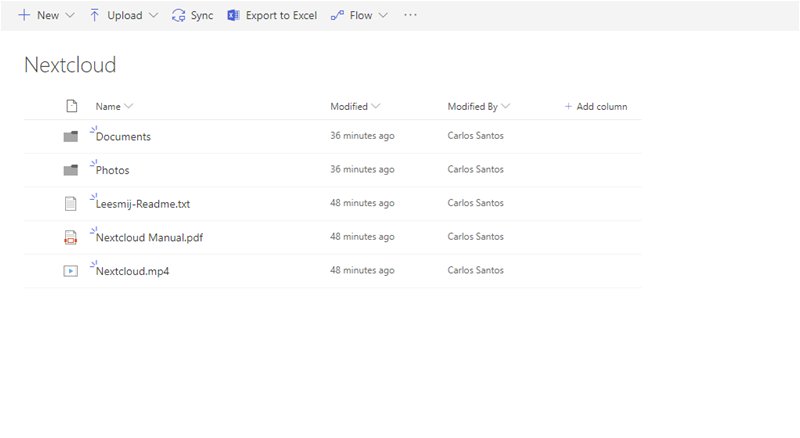
The result in our SharePoint Online library after our initial successful synchronization of Nextcloud will look like this picture.
If you want to use a bi-directional syncronization, you can now switch your connection directon after our first initial synchronization run finished successfully.
Hints and known issues with Nextcloud and Sharepoint
Connection direction
As far as tested, this connection supports uni-directional as well as bi-directional synchronizations. After adjusting the direction to bi-directional, you should check your Mappings settings again because some systems might include read-only columns that cannot be mapped directly.
We also recommend to choose a Conflict Resolution that matches your environments needs. You can find out more about the different conflict resolutions in our Layer2 Cloud Connector User Documentation.
Advantages of connecting Nextcloud with SharePoint
Quick and simple configuration and integration
It only takes a few minutes from download to the first connection. You can have your data synchronized automatically in the background.
Secure access from different devices
Your data is completely yours. You can access securely from anywhere.
Synchronization between networks and devices
Cross-network and cross-device synchronization and integration. You can exchange your data with colleagues or partners exactly when you need it or automatically in the background.
Smart file management
No more manual copying of files, no more chaos and or errors. Your files are always on the most current date.
Enhanced security and privacy
The security and privacy of your data is important to us. That is why your data is completely yours.
Nextcloud data integration and synchronization made easy
If you haven't already tried Layer2 Cloud Connector, it's time to take the first step towards effortless connectivity. Start your Layer2 Cloud Connector trial and experience how easy it can be to connect Azure File Storage to SharePoint.
Frequently asked questions about Nextcloud and SharePoint
Here we will answer the most common questions about Nextcloud and SharePoint.
What is the use of Nextcloud?
Nextcloud is a self-hosted, open-source platform designed for file synchronization and sharing. It allows users to sync files across devices, collaborate on documents in real-time, manage calendars and contacts, and encrypt data for enhanced security. The platform also supports file versioning, enabling users to revert to previous document states. Nextcloud provides integrated chat and video conferencing features, making it a holistic collaboration tool. Additionally, it offers task and project management tools, allowing users to organize to-do lists and collaborate on projects. As a self-hosted solution, Nextcloud gives users control over their data, ensuring privacy and compliance with regulations. Its customizable nature, with a variety of available apps and extensions, makes it suitable for diverse needs, from individuals to businesses seeking a secure and private cloud solution.
Is Nextcloud open source?
Yes, Nextcloud is an open-source platform. This provides transparency, flexibility, and the ability for the community to contribute to its development. Users can install and host their own Nextcloud instance, giving them control over their data and allowing customization based on their specific requirements. Open-source software promotes collaboration and community involvement, and Nextcloud benefits from contributions from developers and users worldwide.
Why should I integrate or synchronize Nextcloud and SharePoint?
Integrating Nextcloud and SharePoint can be great for organizations seeking a balance between collaboration features and privacy control. This approach is useful when specific features of Nextcloud, like secure file sharing, are desired alongside SharePoint's document management capabilities. File synchronization ensures consistency across both platforms. Integration accommodates diverse user preferences and can meet stringent data governance and compliance needs. However, challenges such as compatibility issues and increased complexity should be considered. Careful planning and testing are crucial before implementing integration, and organizations should stay informed about updates to both Nextcloud and SharePoint that may impact interoperability.
Integration and synchronization made easy
Are you ready to unlock your full potential and integrate your data for seemless collaboration?

