Email Integration

Email data can be integrated and synchronized codeless with various external systems, on premises or in the cloud, using the Layer2 Cloud Connector Enterprise Edition.


Learn on this page how the data integration of Emails is working with the Layer2 Cloud Connector Enterprise Edition by using the step-by-step screenshot tutorial and reading our important advice and frequently asked questions. Make use of the benefits and features of this data integration tool by trying it out yourself: Free Trial Registration


HOW IT WORKS


In fact, you only need to do the 5 following steps to get your Email data integration started.


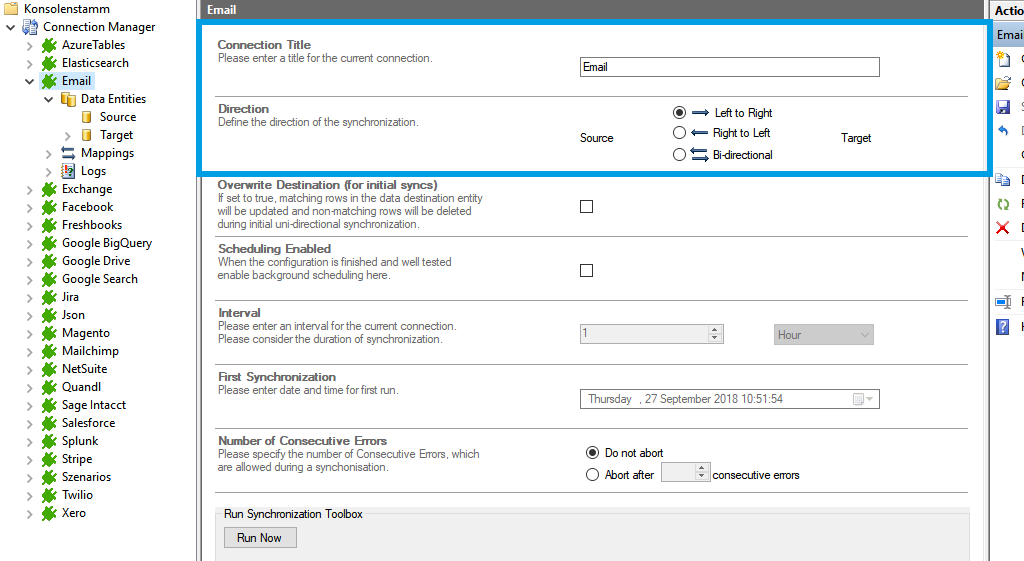
  • Setup your connection as required: one-way in this case.
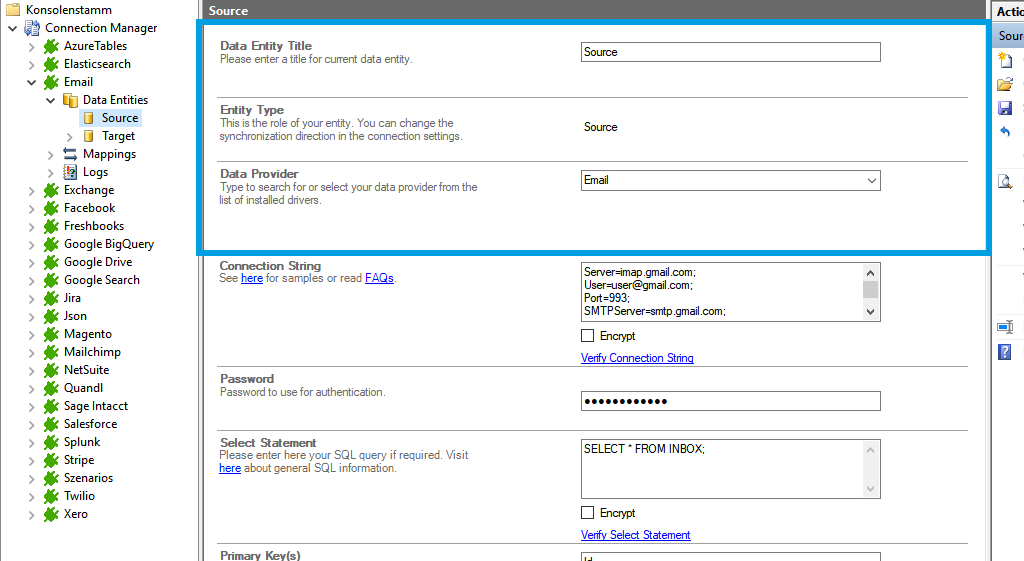
  • Setup your data source, in this case Email.
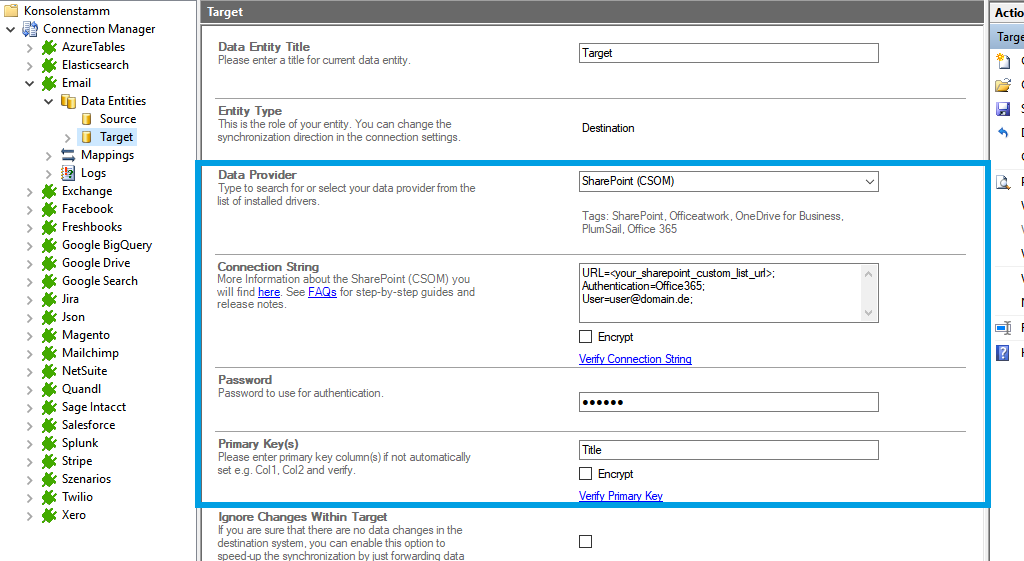
  • Setup your target – for example a Microsoft SharePoint list or library.
  • Setup your mapping.
  • Start your project!

Email step-by-step data integration via the Layer2 Cloud Connector


Use this step-by-step-instruction to get through the whole product and data integration configuration easily. Some steps require a copy-paste task of code snippets. Please follow the recommendations in this instruction closely.


Before you can proceed with the configuration, please be aware that


  • You need to configure your email account and activate "allow less secure apps" or similar.
  • You have to note down the full name of your email account.


Connection setup for Email in the Layer2 Cloud Connector
Source setup for Email integration in the Layer2 Cloud Connector
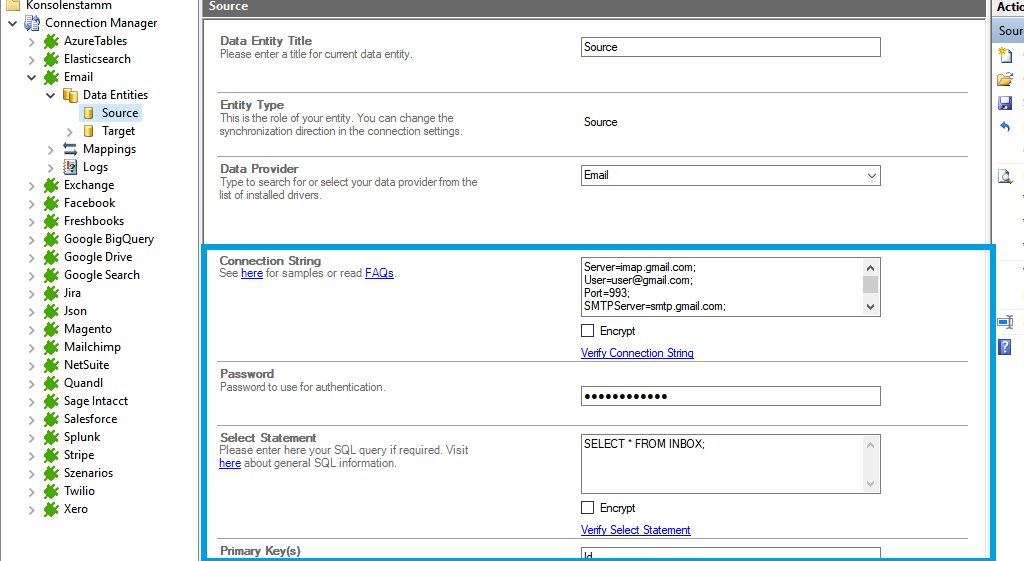
Connection string setup for Email data integration in the Layer2 Cloud Connector
Target setup for Email integration in the Layer2 Cloud Connector
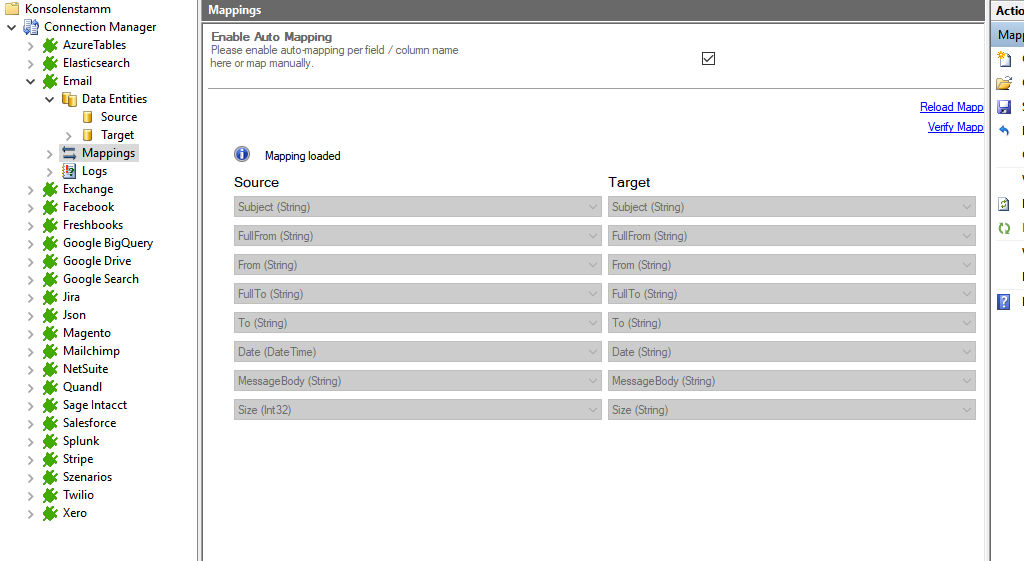
Mapping in the Layer2 Cloud Connector for Email data integration
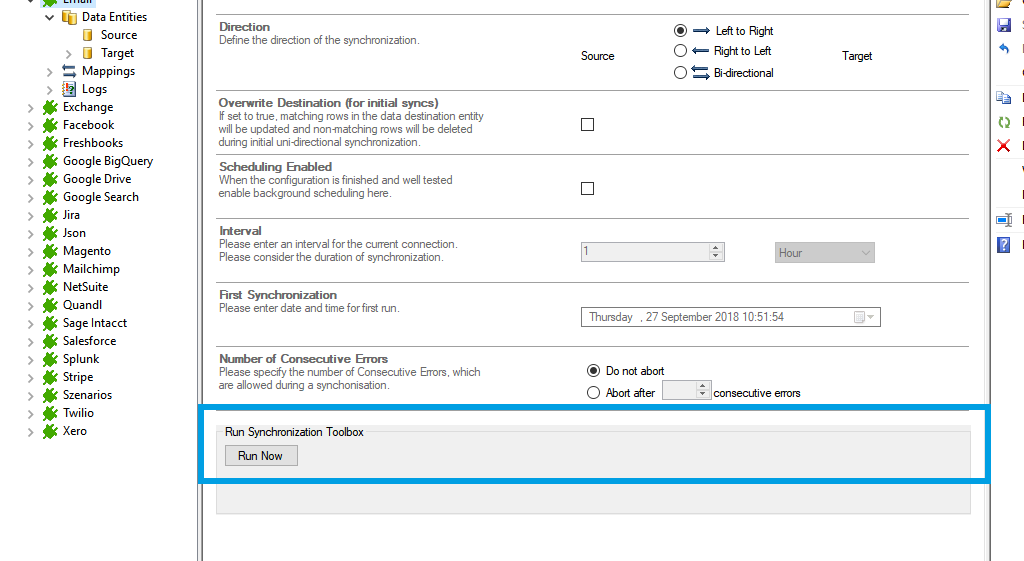
Start the data integration of Email integration-start
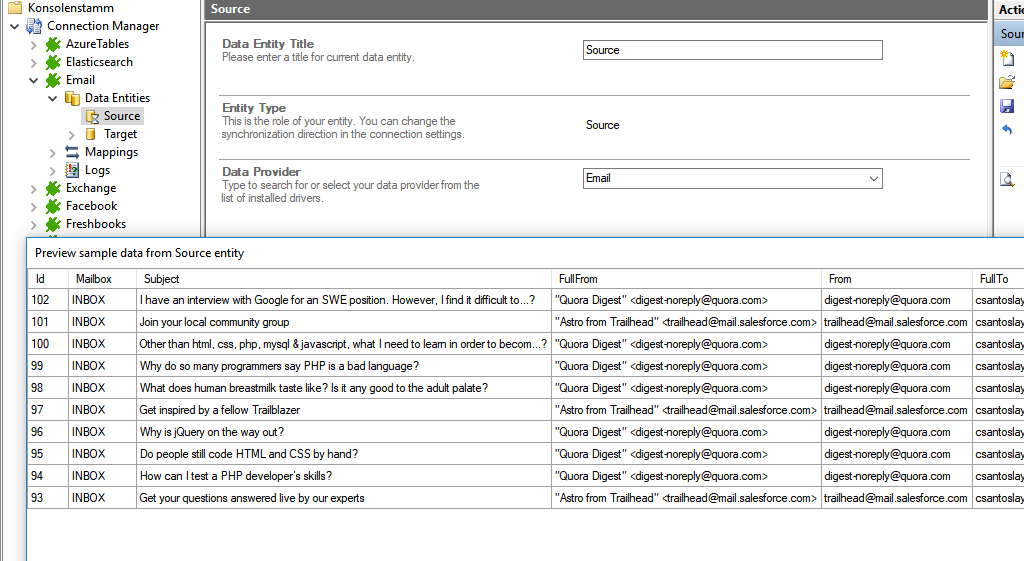
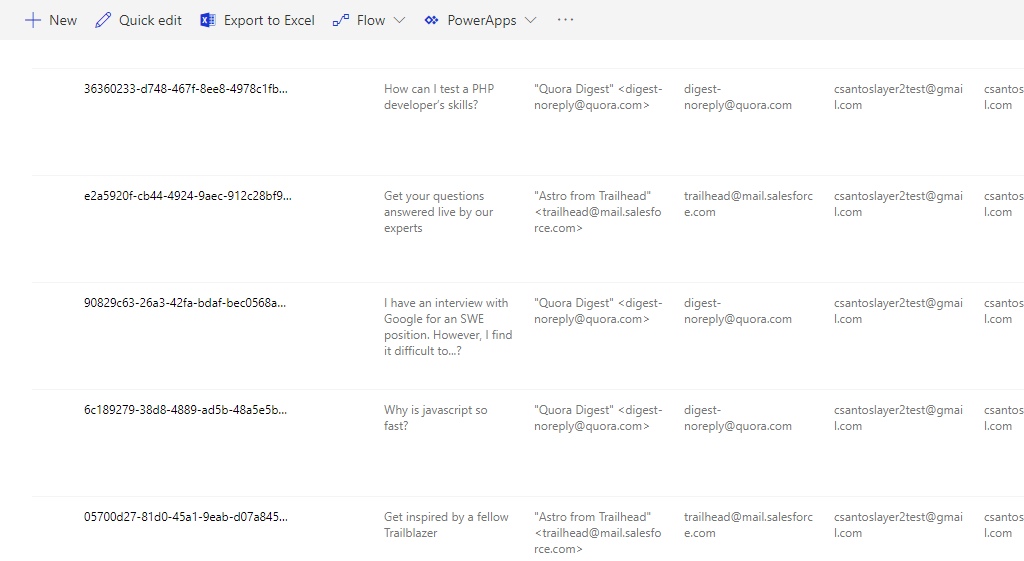
Preview data of Email integration
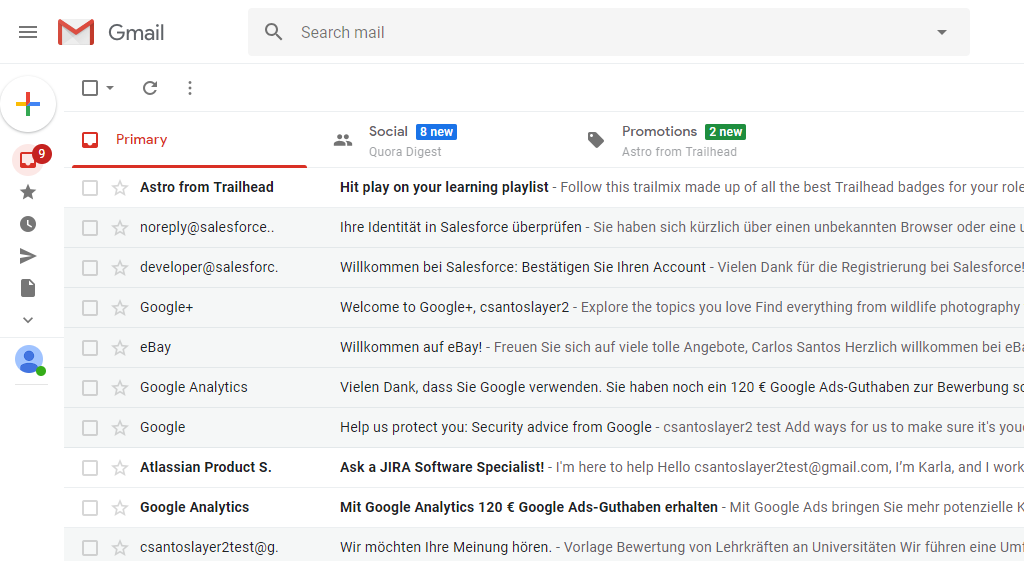
Data of Email ready for integration with SharePoint
 Finished data integration of Email.

Specific Connection Settings for your Email integration


Please copy and paste this connection string into the designated field like described in Step 2.5 of the step-by-instruction above.


Server=imap.gmail.com;
User=<user>@gmail.com;
Port=993;
SMTPServer=smtp.gmail.com
Other='BatchSize=1';


Select Statement:


SELECT * FROM sys_tables;
SELECT * FROM sys_views;


Benefits of using the Layer2 Cloud Connector for your Email data integration

Time saving

Quick and easy installation in just minutes. Combine your data automatically in the background and benefit of better insights and greater revenues.

Multi-talent tool

Sync your Email data one-way locally or cloud-based and use it for migration, backup, or permanent synchronization projects. It is up to you.

High security

There is no access to your corporate data from the internet and no data transfer will occur to 3rd-parties. You have the full control.

Many setting options

Use the Layer2 Cloud Connecor in a very easy and simple way, or benefit from customizable options and features. You decide.

Many data provider included

To be even more easier: Use our own customized providers for common systems. Many more vendor-specific or 3rd party ADO.NET data providers are supported as well.

Cost-effective licensing

3 fully-featured product editions are available: Personal Edition (for one conncetion only), List and Table Edition, and Enterprise Edition as our one-stop-shop solution. Have a look at the Buy Now Page.

Known limitations and workarounds


Please take into account our advice and known limitations:


  • Connection direction
    This connection can be bi-directional.

Take your next steps

Ifoc for free trial product regsitration - Layer2 leading solutions

Register for a free trial

Get your free trial version of the Layer2 Cloud Connector by a quick registration.


Icon for Layer2 Solutions Finder- Layer2 leading solutions

About the Layer2 Cloud Connector

Get more information about the Layer2 Cloud Connector on the product page.


Contact Us Icon for Layer2 leading solutions

Any Questions?

Drop us a short note with your enquiry by filling out the contact us form.